How-To
How to Froth Milk Without a Frother
You can get warm, foamy milk with gear you already own — a jar, a French press, a whisk. Here's how each method works, what foam you'll actually get, and the one cheap upgrade that beats them all.
You do not need a dedicated milk frother to put a cloud of foam on your coffee. With a jar, a French press, or even a fork, you can turn cold milk into warm, airy foam for a cappuccino or a foam-topped mug in a couple of minutes. What's worth being honest about up front is the ceiling: every one of these methods makes foam— light, bubbly, cappuccino-style froth — but none of them makes true microfoam, the dense, glossy, paint-like milk a steam wand produces for latte art. That distinction drives everything below, so we'll cover each method, exactly what it gives you, where it falls short, and the one inexpensive tool that outperforms all of them.
What kind of foam you can actually get
Frothing milk is just forcing air into it so the proteins trap tiny bubbles. Do it to warmmilk and the foam sets and lasts; do it to cold milk and it collapses faster. The methods here all add air mechanically — shaking, pumping, whisking — which produces a lighter, drier, more bubbly foam. That's perfect for a cappuccino, where you want a thick, spoonable cap, or for any drink you sip through the foam.
What they can'tdo is make the tight microfoam that folds into a latte and pours latte art. A pressurized steam wand heats and textures the milk at the same time, breaking bubbles down to near-invisible; a jar or whisk can only add air to milk you've heated separately. So set your expectations at "great cappuccino foam," not "café latte art," and you'll be delighted with these. If microfoam is the goal, our guide to how to steam milk explains why a real wand is the honest answer.
1. The jar shake + microwave
The one everyone has the gear for. Fill a jar with a tight-fitting lid no more than a third fullwith cold milk — it needs room to expand. Screw the lid on firmly and shake hard for 30–60 seconds, until the milk roughly doubles in volume and looks foamy. Then take the lid off — this part matters — and microwave the open jar for about 30–45 seconds. The heat sets the foam so it holds together long enough to spoon onto your coffee.
What you get:a generous, airy foam — genuinely good on a cappuccino. The limit:the bubbles are on the larger side, the foam is dry, and it's the messiest method if you overfill.
2. The French press pump
If you own a French press, it's the best no-electricity frother in the house. Warm your milk first (stovetop or microwave to about 140–150°F), pour it into the press no more than a third full, and pump the plunger up and down briskly for 20–30 seconds. The fine mesh screen forces air through the milk and breaks the bubbles down as you plunge, so the foam comes out noticeably finer than the jar method.
What you get:the closest a manual method gets to smooth foam — tighter and creamier than shaking. The limit:you have to heat the milk separately first, and it's an extra vessel to clean.
3. A whisk or fork
The true bare-minimum method. Heat your milk, then whisk it vigorouslyby hand — a balloon whisk works far better than a fork, but a fork will do in a pinch. Rolling the whisk handle quickly between your palms is more effective than stirring in circles. A minute of hard whisking gets you a modest, bubbly foam.
What you get: enough foam to top a mug, using zero special gear. The limit:it's the most effort for the least foam, and the bubbles are coarse — fine for a quick cortado-style drink, underwhelming for a proper cappuccino.
4. An immersion blender
A stick (immersion) blender is a frothing powerhouse. Warm the milk in a tall, narrow container (to control splatter), tilt the blender so it draws air in near the surface, and run it in short bursts for 15–20 seconds. It aerates milk fast and produces a lot of volume.
What you get: big, fast foam — the most volume of any method here. The limit:it's easy to over-aerate into stiff, dry foam, it can splatter, and it's a bulky tool to clean for one coffee. Keep the head submerged just enough to pull air without launching milk across the counter.
Getting the best foam from any method
Whichever method you pick, a few fundamentals separate a proud cappuccino cap from a sad, flat disappointment. None of these cost anything — they're just the physics of how milk foams:
- Reach for whole milk.Fat carries flavor and helps stabilize the bubble walls, while milk protein does the actual foaming. Whole milk balances both, so it's the most forgiving and the most naturally sweet. Skim whips up taller but tastes watery and collapses fast.
- Start cold, then heat. Cold milk holds air more readily as you introduce it, which is why the shake-a-jar method starts cold and heats after. For the press, whisk, and blender you warm the milk first because heat is what sets the foam so it lasts in the cup rather than deflating in seconds.
- Don't overheat.Milk is at its sweetest and foams most stably around 140–150°F. Push much past 160°F and the proteins break down, the milk scalds, and you get a cooked, papery flavor with stiff, brittle foam. If you can barely keep a hand on the container, it's hot enough.
- Use fresh milk and leave headroom. Older milk foams noticeably worse as its proteins degrade, and every method needs the container no more than a third to half full so the foam has room to expand.
- Swirl and tap before you pour. Give the vessel a firm swirl to fold the foam back into the liquid and tap it once on the counter to pop the biggest bubbles. It tightens the foam and makes it pour more evenly onto the coffee.
Get those right and even a humble jar produces foam you'd be happy to serve. Get them wrong — skim milk, overheated, in an overfilled jar — and no gadget on earth will save the result.
The no-frother methods at a glance
| Method | Foam quality | Effort | Main limit |
|---|---|---|---|
| Jar shake + microwave | Airy, larger bubbles | Low | Dry foam; heat with lid OFF for safety |
| French press pump | Finer, creamier | Medium | Must heat milk first |
| Whisk / fork | Modest, coarse | High | Most work, least foam |
| Immersion blender | High volume | Medium | Over-aerates; splatters; bulky to clean |
| Handheld frother | Consistent, fluffy | Very low | Still cappuccino foam, not microfoam |
Every row makes cappuccino-style foam, not latte microfoam. If you find yourself frothing milk most mornings, the effort and cleanup of the manual methods add up fast — which is where a cheap dedicated tool earns its keep.
The cheapest real upgrade: a handheld frother
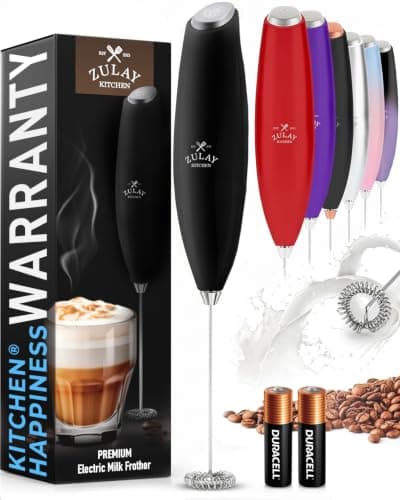
If you froth milk regularly, the single best value upgrade is a handheld electric frother— a battery-powered wand with a small coiled whisk on the end. It's barely more effort than a spoon: warm your milk, sink the whisk just below the surface, and let it spin for 15–20 seconds. It aerates faster and far more consistently than shaking or whisking, and it rinses clean in seconds under the tap.
Our go-to recommendation is the Zulay Milk Frother Handheld Electric Whisk. It's a proven, widely-owned little tool with a stainless whisk and a comfortable handle, it runs on ordinary AA batteries so there's nothing to charge, and it costs a tiny fraction of a milk-frothing appliance or an espresso machine — genuinely one of the most affordable coffee upgrades you can make. For occasional foam it's all most people ever need.
Two honest caveats. First, like every method on this page, a handheld frother makes airy cappuccino-style foam, nottrue steam-wand microfoam — it can't pour latte art. Second, it froths but doesn't heat, so warm your milk first. If you want a countertop unit that heats and froths together, or you're comparing models, see our best milk frotherroundup. And if latte art is the real dream, that means a machine with a steam wand — a Nespresso with an Aeroccinois the easy entry point, and once you're steaming for real you'll want a proper milk frothing pitcher to pour from.
Frequently asked questions
How do I froth milk without any special equipment?
The easiest no-gear method is the jar-and-microwave trick: half-fill a lidded jar no more than a third full with cold milk, shake hard for 30-60 seconds until it doubles, then take the lid OFF and microwave for 30-45 seconds to set the foam. A French press (pump the plunger), a whisk, or an immersion blender also work. All of them make airy cappuccino-style foam.
Is it safe to microwave milk in a jar to froth it?
Yes, but only with the lid OFF. Never microwave a sealed jar — trapped steam builds pressure and the lid can burst. Shake with the lid on, then remove it before heating. The glass gets very hot, so use a towel to handle it, heat in short bursts, and watch for milk that can boil over.
Can you make latte art without a steam wand?
No. Every no-frother method — jar, French press, whisk, blender, or a handheld frother — makes light, airy foam with visible bubbles, not the dense microfoam latte art needs. Only a pressurized steam wand heats and textures milk at the same time to make pourable microfoam. The no-wand methods are great for cappuccinos and foam-topped drinks.
What's the cheapest tool for frothing milk at home?
A handheld electric frother wand, like the Zulay Milk Frother, is the best-value option — it costs a small fraction of a countertop frother or espresso machine, runs on AA batteries, and froths faster and more consistently than shaking or whisking. Just remember to warm the milk first, since a handheld wand froths but doesn't heat.
Do I need to heat the milk before frothing it?
For foam that lasts, yes. Warming the milk (to about 140-150F) helps the proteins trap and hold air, so the foam sets instead of collapsing. The jar-and-microwave method builds this in by heating after you shake; with a French press, whisk, or handheld frother, warm the milk first.
Sources
Keep reading
Buying your first setup?
See how we pick — compiled specs, cost-per-shot math, and honest trade-offs — then dig into the guides. No fake test lab, no rankings for hire.